November 13, 2010

My Father's Birthday!

This card is a month late (thus the HouseMouse stamp with the tortoise!)... But I hope he enjoys it, still. :)

Recently, my friend told me her art teacher in high school forbid them from smudging colored pencils when coloring... And that apparently art professors (at least at Cal Poly) don't smudge it, either. Not even with special solutions for smudging pencil! I thought it was a little weird, because Prismacolor pencils, smudged with Turpenoid, give a nice result... So, for this card I actually challenged myself to not use Turpenoid! Here's how it came out... :)


Not bad, hm? :) I actually think that it looks a bit brighter than it would have if I did it my usual way... This is a HouseMouse stamp, and I cut it out, every little grass leaf, (took me forever, but totally worth it!) and used a tape roller to glue it on the baby blue paper. The brown paper was Cuttlebugged and then I mounted the baby blue paper onto it. The white dots are pearl-looking like beads, just glued.. :) And of course, ribbon; and some Stickles for the sentiment. :)

And this.. is the inside!


These images are also colored without Turpenoid intervention, even though I was so tempted to smudge the color on the little lion's face! :) The writing is in Russian.. It's glittery, but you cannot see that in this photo. And the dots are Stickles, just to fill up the background somehow. :)


On this close-up, you can see that both the lion and the bird are embossed. Makes them pop a bit on the flowery background. :) Finally, the edges were cut with some shaped craft scissors.

And... That is it! :) I would like to enter this card in the following challenges:


Products I used:

  • Stamps: HouseMouse - Slow Pokes; Autumn Leaves - Mindy's Zoo
  • Inks: Vintage Photo Distress; Versa color - royal blue; Memories - black
  • Embossing: D'Vine Swirls Cuttlebug folder
  • Denami clear embossing powder
  • Prismacolor pencils
  • Stickles glitter glue: cinnamon, waterfall, golden rod, turquoise
  • Fiskars scissors - ripple

November 7, 2010

A (Late) Halloween Card

This is the second time I enter a card into challenges! Very exciting for me! :) 

I absolutely love House Mouse images, so when I accidentally found specifically a House Mouse challenge blog... I knew I had to make a card, and a design idea popped into my head a second later, so I got on it. The challenge was to make a Halloween-themed (or -colored) card and use a House Mouse stamp. And.. Here's the result: 


I don't have any pumpkin stamps, so I freehanded and painted the pumpkin with acrylics. It is mounted on the vellum, and the mouse (such a cutie!) is actually mounted onto the pumpkin. Hope he doesn't wake any time soon, or it will give him a big fright... :) The mouse was colored with Prismacolor pencils. The bow is there just for a little embellishment.

I am going to give this card to a friend, so I will also decorate the inside, and will update this post later. (No time to decorate it before the the challenge closes for this week...)

I am entering this card in the following challenges:
House Mouse challenge #81
Crazy4Challenges - square card
Lexi-s Creations, #26 - anything goes

November 2, 2010

Birthday Cupcake

No more wood-burning (at least not for a long while..), and meanwhile.. back to cards! :)
This one I made for a friend of mine who loves food and especially cakes. Thus, practically all of the stamps I used were cakes... Mmm, yummy! :)


I cut the light lime paper out with craft shaped scissors, cuttlebugged it, and used Stickles for the border. It is mounted on the black-gold paper, so the card doesn't look too flat. :) The cupcake, I stamped, colored with my Prismacolor pencils and the stamped the top again (Stamp-a-ma-jig aligns it perfectly!) and embossed it. (Can't tell it's embossed form this picture though...)


I did the same procedure with the little cakes, also added some Stickles. The skeleton is embossed, too. :) The hardest part was writing... I do not own a white pen (yet!), so the best I could do was paint all of the words with acrylic white paint.... Which was not too fast. But it worked! :)

Products I used:

  • Birds and Swirls Cuttlebug embossing folder
  • Studio G clear stamps (the skeleton); Inkadinkado Birthday Cupcake clear stamps
  • Denami clear embossing powder
  • Inks: Colorit black pigment; Vintage Photo Distress; Versa color: orchid, orange, fresh green, baby blue, royal blue; Color Box frost white

October 31, 2010

BOO!

Just wanted to wish everyone a safe and HAPPY Halloweeeeen! :D 


This is my first ever carved pumpkin, I made it a week ago. Sadly, it didn't live until Halloween, but luckily I did take a picture of it before it molded. :) Hope you're having a fun weekend! :D

October 27, 2010

Wood-burning: Totoro

Here's another wood-burning project that I did in my last few days in Russia, and then colored when I was already back in the USA. It is a picture of Totoro (the cute main character from the Japanese "My Neighbor Totoro"). :) And it was a birthday present for one of my good friends. :)


I started out coloring it with watercolor paint, but it bled more than I expected it to, and I ended up buying some acrylic paints to use on this picture. This was my first time ever using acrylics, but I think they worked out well. :)


The back is pure wood-burning. And Russian is my nickname at college. :)

October 26, 2010

Wood-burning: 1915 Fashion

Please excuse that I have not posted in a while... Here is something that is actually different from my usual repertoire. Wood-burned pictures! :) I was unable to take any of my crafting stuff with me to Russia, but I found my mom's old wood-burning tool (~30 years old.. :D ) in the attic.. And thought I'd play around with it. I did a few little pictures at first to try it out, and then went on to burning and also coloring in the image... Here are the results.

These two ladies are from a book of postcards that my mom has. The postcards are of 1915 fashion from New York, copied from French fashion (probably of the same time). Their faces and hands look a bit awkward.. But that is how it was in those pictures. :) *I don't mean to plagiarize the pictures, these were done just for my personal practice in wood-burning.*

Coloring was done in watercolors. I don't know why the left lady did not bleed much (I mean the paint, of course :) ), but the one on the right did bleed alright... However, that was not much of a problem, because my mom (who I ended up gifting it to) said it added a cool effect to the picture and she liked it better that way. :)


Here they are a bit closer up:


Here you can see the bleeding. Not bad when it is around the picture, but it does not discriminate and when purple and blue bleed, for example, from her collar onto her face... It's not so great.


This concludes 1915 fashion show for tonight, ladies and gentlemen! :) However, I do have another wood-burning project that I will share with you in a day or two. :)

August 15, 2010

Vacation!

Hello :)

I am leaving to Moscow, Russia, in a few hours... So this blog, along with me, will be on vacation until late September... Because I cannot bring any crafting supplies with me... :( (Too much to bring! And.. what if the bag gets lost?...)

So... Yes. Vacation. And then straight back to school! Yayyyy! :)

Hope everyone has a good rest of summer,

Xushenka.

August 10, 2010

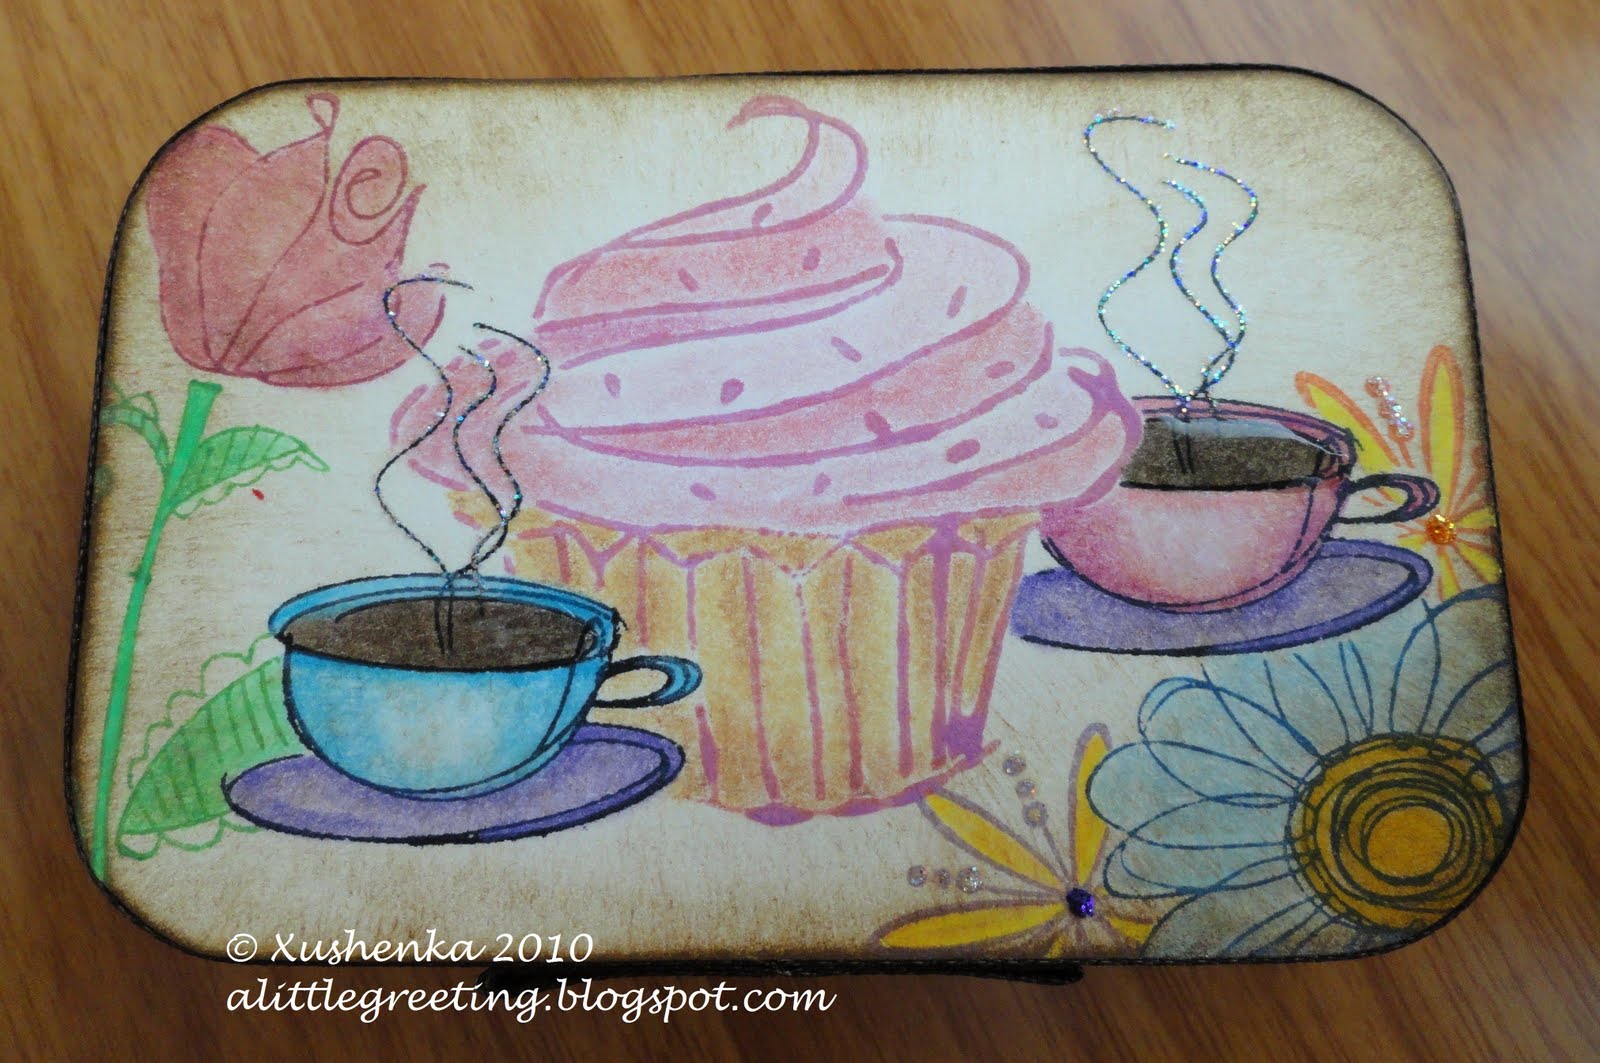
Mint Box

Here's another decorated Altoids tin that I have made this summer! This one, however, is a present for a friend. :)

Top:

This is another stamped collage, colored with Prismacolor pencils. I distressed the edges with "Vintage Photo" Distress ink and highlighted some parts with Stickles glitter glue. To make the coffee look liquid, I added Diamond Glaze over the brown in the cups. :) I couldn't get it to come out well in the photo, but you can kinda see its gloss in the cup that's on the right. :)

Bottom:

Just like with the previous box I've made, the bottom is just a stamped collage of flowers, colored with Prismacolor pencils and the edges were distressed with the same Distressed ink like on the collage for the top.

Here's a better photo of how the ribbon looks from the front of the box:


I spent two days looking for the bottom ribbon! For some unknown reason there were no brown and pink ribbons that would fit this size. :/ So, I ended up using two ribbons... A pink one with black polka dots and a gorgeous brown transparent one with swirls on it.. I think it came out well :) But hunting for ribbons is definitely a hard job.. lol

I meant this box to continue serving as an Altoids mint box, so I just stuck the original mints back in there, and the original paper, too. (I saved them in Ziplock baggies so they don't get damaged.) And since a mint box isn't something people usually keep safe on a shelf.. But rather something one would throw in a purse/ bag/ backpack.. I have also made a little purse for the box so it doesn't get damaged :)


(On the inside, it's baby blue velvet.)

As easy as this little bag looks, it still managed to give me a little trouble! lol My sewing machine is at a friend's house 2 hours of driving away, and I got lucky that I was going to visit them this past weekend, so I didn't have to hand-sew the little bag. Well, I could have, but the quality and speed are so much better with a sewing machine ;) But... I totally forgot the pedal from my machine stayed at home in LA!.. So I had to run the poor machine with my hand. Not sure if that's good for it.. But I really needed to get this done. :/ So... The machine and I struggled for a few hours, and this is result :D I like it, and it fits the box (yay!), so it was totally worth the time and effort. :)

August 9, 2010

Another Just For Fun Challenge

It is the color challenge #23 at Just For Fun Rubber Stamps' blog! And the colors are kraft, red, and white. I decided to do some shape other than just a rectangle/square and a heart is what jumps to mind with red and white being among the colors.. And that was pretty easy. :) So, here it is.. :)


This card can't really "stand up" on it's own.. so I had to use a candle to hold it up, lol :)

I drew/cut out the hearts without any stencils, and embossed the white one with the D'vine Swirl Cuttlebug embossing folder. The dog is from the Dog's Life by Inkadinkado clear stamp set, stamped in black ink, colored with Prismacolor pencils (and that's where the kraft color comes in), then stamped again in black ink, and embossed with clear embossing powder by Denami Design. :) Stickles glitter glue makes up the border for the dog picture. And.. That's it!

Altered Tin

Up until a few weeks ago, I have done only cards. But then.. I had this tin from Altoids mints lying around, and those little boxes are just so great, I can never make myself throw them out. At the same time I was looking for something original and useful that I could make as a souvenir for a friend.. And that's how I came to trying out altering an Altoids tin! :) I found out that it's actually a pretty popular tin to alter, and I enjoyed looking at a lot of different beautiful designs online...

And here is... the first Altoids box that I've ever altered! :D

I was not making it for anyone in particular, so the design is more for "prettiness" rather a message for a friend.

Top:

Both the top and the bottom are basically collages stamped on a white cardstock, colored with Prismacolor pencils, and then distressed with the "Vintage Photo" Distress ink.. With Stickles glitter glue to finish it up and add some highlights and happiness to the collage :)

Bottom:

The stamps I have used are from the following sets: Doodle flowers by Inkadinkado, Lucky ladybugs and Make a wish from the Sarah Phelps collection, Sparkle clear: Tea by Hero Arts, and Series 14 by Studio G.

I really love how this box came out, and it is a lot thanks to the ribbons... Here's a better view of how the ribbons look on the front:


Don't these two ribbons just go together perfectly? :) I think they do... And their sizes fit the box perfectly, too... It is so hard to find ribbons whose sizes fit this box, my friend Laura even joked about how I should ask the ribbon companies to make more pretty ribbons that fit Altoids tins :D

Anyway.. This was my first attempt, and I liked it a lot :)